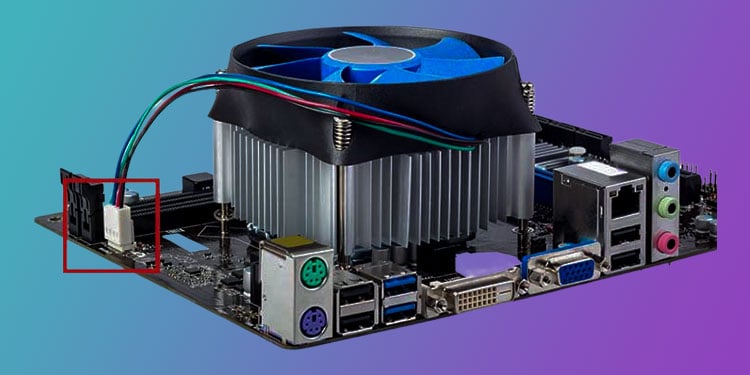
CPU fan is what cools down the CPU chip when its temperature rises. The heat is transferred to the heat sink. CPU fans then cool the heat sink. And this is basically how a CPU cooler works. If you do not place the CPU fan header to the correct pins on the motherboard, the fan may not spin at all or will spin at a lower RPM. If that happens, there is nothing to cool down the heat sink. This is when you face thermal throttling. Meaning that the CPU will lose its performance. Today, to avoid this exact issue, we are here to provide you with a detailed and simple guide to connecting the CPU fans header to the motherboard.
Does It Matter Where I Plug My CPU Fan?
If nothing is connected to the CPU_FAN header on the motherboard, it will display some errors during the POST test. If the computer passes the POST test, the CPU fan might spin as long as it is connected to the SYS_FAN header. However, it will spin at its maximum RPM, making a lot of noise. Besides this, the voltage supplied to the CPU_FAN header on the motherboard is temperature-controlled. Meaning that depending on the temperature, the system increases or decreases the temperature. You will not have this feature if you connect the CPU fan to a different header.
How to Connect CPU Fans Header to the Motherboard?
Inserting the CPU fan connector into the motherboard is a simple task if you know where the headers are located on the motherboard. You need to connect the cable from the CPU fan to the header named CPU_FAN on your motherboard. First, let us see where this specific header is located.
Locate CPU_FAN Header On Motherboard
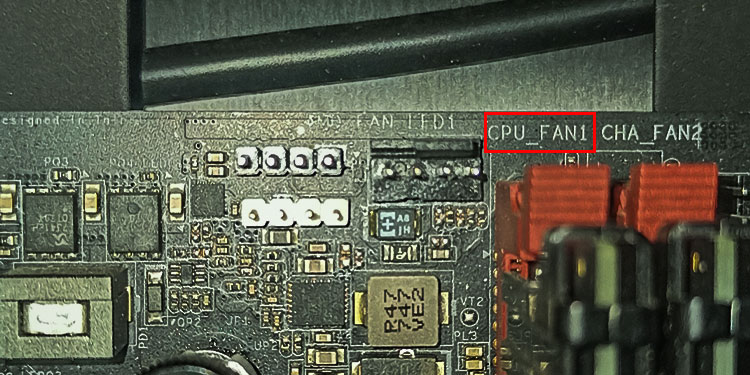
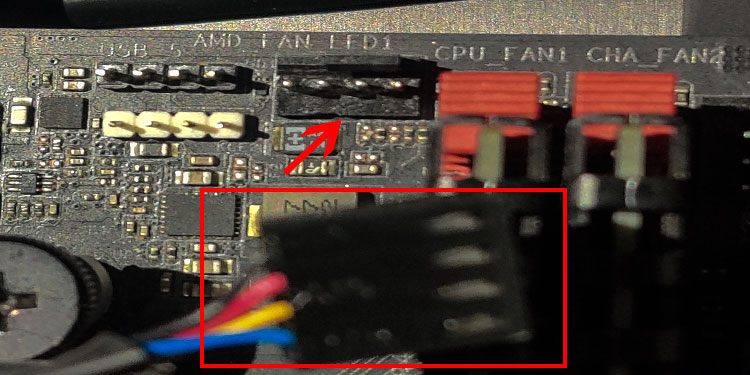
As you have already noticed, the wire from the CPU fan is relatively short. Therefore, the CPU_FAN header is also located near the CPU socket on the motherboard. To locate them, search for the four-pin header on your motherboard. You might see multiple four-pin headers. Make sure that CPU_FAN or CPU_OPT is written under it. There may be a single or multiple CPU_FAN on your motherboard. If it has multiple CPU_FAN headers, it is indicated as CPU_FAN1, CPU_FAN2, etc. Make sure that you do not connect to the header named SYS_FAN.
Insert the Cable From the CPU Fan
Once you locate the CPU_FAN header, take the wire from the CPU fan. Align the cable and the header and gently connect. This cable only goes in one way. So, do not force them in if you cannot insert them. Flip the cable and try again. After connecting the CPU fan to the motherboard, turn on the computer to check if the fans spin. If you have the motherboard connected to the monitor, check if you see any errors regarding the CPU fan during the POST test.