However, you may have to disable this feature in some scenarios. For instance, you may want to restrict user access to search if you want to create a limited environment domain. Many search features are also redundant and you may want to disable those instead of the search application altogether. So, we have created this article to help you enable/disable Windows Search or its specific features.
How to Enable/Disable Windows Search
There are mainly two ways to enable or disable Windows Search. They actually have different outcomes, so read carefully and pick one according to your need.
Change Search Service Behavior
The most convenient method to enable or disable Windows Search is by changing its service configuration. The Windows Search service handles indexing, caching, and search results for files, e-mail, etc. So, disabling this service turns off indexing altogether. However, keep in mind that you can still use the search app. It can’t find your files and folders unless you enter the exact name or the initial part of the name. But you can still use the Start menu to search for apps and web results. Regardless, here are some of the ways to disable your search service:
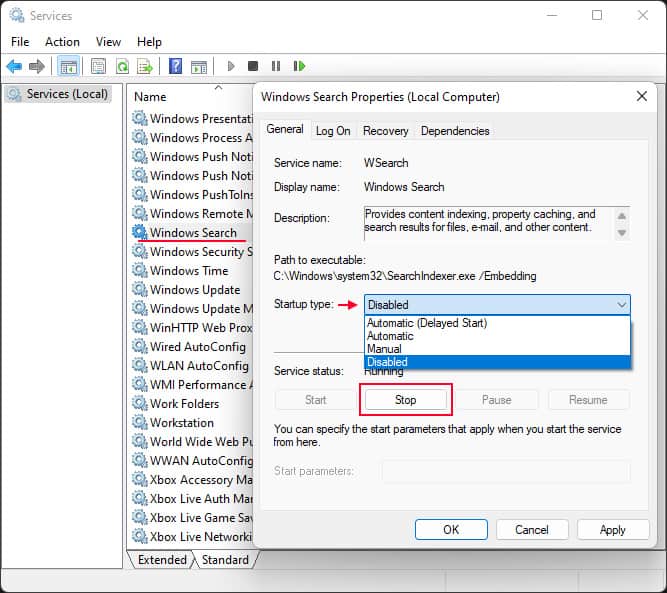
Through Services App
The Services app is the default program you can use to change the configuration of your system services, including the Windows Search service. Here’s how you can enable/disable Windows Search Service:
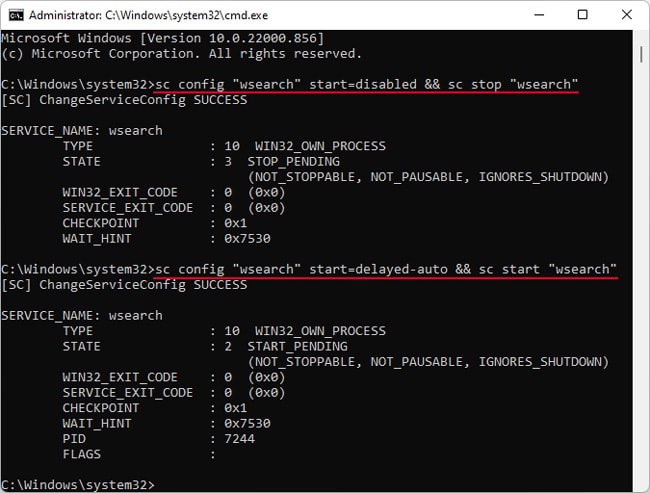
Using Command Prompt
Another easy way to enable or disable the Windows Search service is by using the Command Prompt. You only need a single command in both cases, so copying and pasting the command is more convenient. Here’s what you need to do:
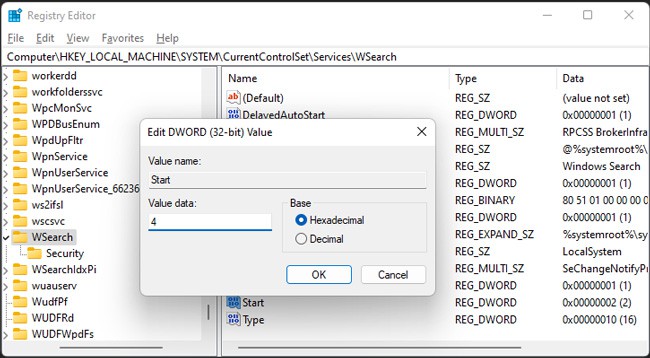
With Registry Editor
You can also modify the service’s settings by changing its configuration in your registry settings. In fact, all the above methods change the values in the relevant registry entries and your system directly looks at these entries to check the service configuration. To use the Registry Editor to change such entries, Restart your PC after changing the values for your system to apply the changes.
Rename Search Folder
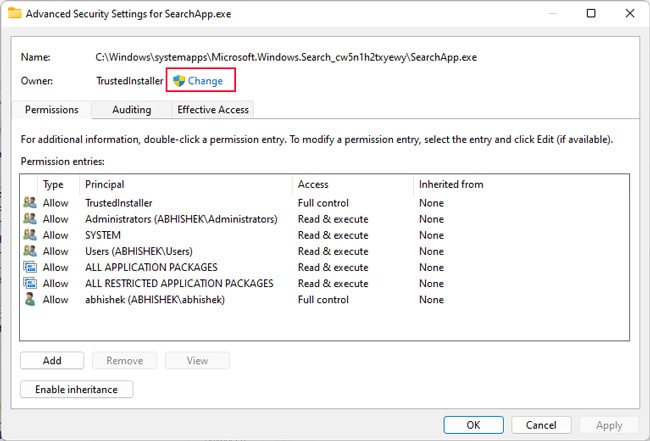
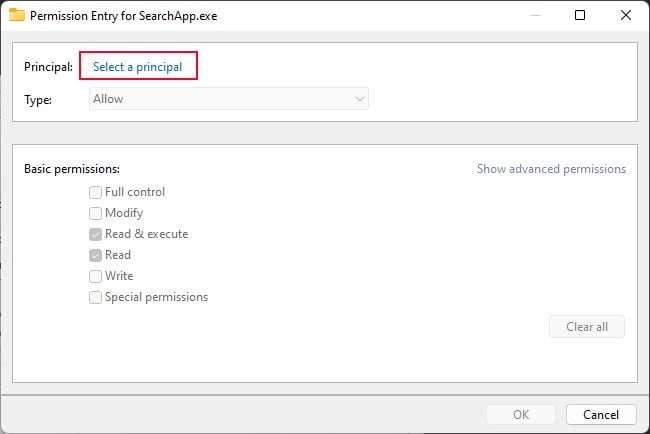
Renaming the system folders and files used in the search feature is a great way to disable the feature from your File Explorer as well as the Start menu. Here, renaming is the same as deleting the files while creating backups. It effectively stops your system from using such files altogether, making search impossible unless you change the folder back to their default names. However, this method requires you to change the permission settings for the folders and files. So we recommend you create a restore point beforehand to account for any issues due to improper permissions. The complete method is as follows: You need to restart your Windows Explorer to apply the changes. To do so, If a window with the name, Search, keeps popping up and closing continuously, you need to restart Windows Explorer again.
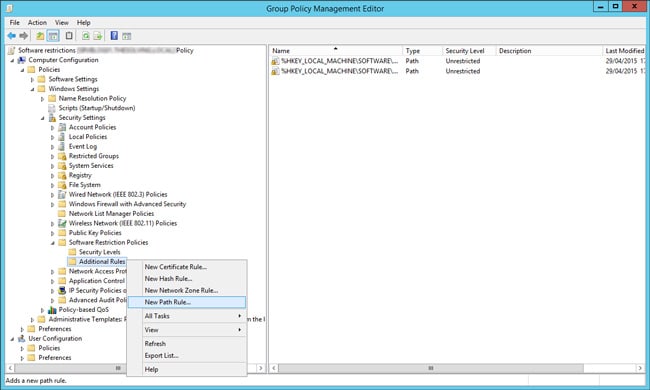
Through Group Policy Management Editor
This method is a safer alternative to renaming the search files and folders. However, you can only use it by creating a Software Restriction Group Policy Object for a domain. Here’s how you can do so:
How to Enable/Disable Windows Search Web Results
Showing web results in Windows Search does not have many advantages. In fact, many users unknowingly open the web result when they actually want to run an app or any file in their local drive. So, if you want to disable this feature, you can do so easily using the steps below: Restart Windows Explorer (see above) to apply the changes.
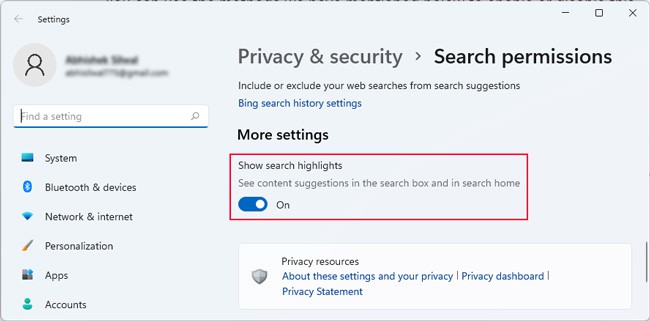
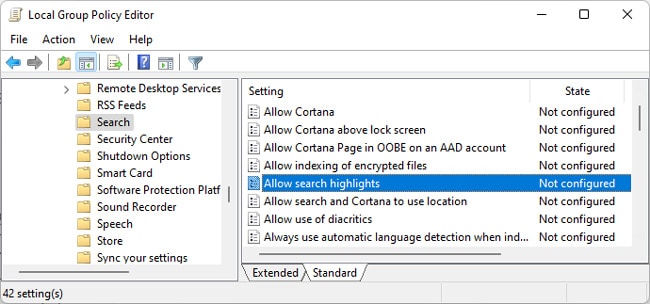
How to Enable/Disable Search Highlights
Another possible search feature you might want to delete is the search highlights. It distracts you from your work and many users prefer customizing the start or search menu to their liking instead of automatically getting highlights based on Bing searches. You can use the methods we have mentioned below to enable or disable this feature. Some of the methods overwrite other methods, so we recommend performing all of them.
Change Search Settings
The usual way to enable or disable search highlights is through the search permission Settings. The methods differ between Windows 10 and 11, so we have included both of them On Windows 11 On Windows 10
Using Group Policy Editor
You can also change the group policy settings to enable or disable search highlights. This option overrides the settings so make sure to check it as well.
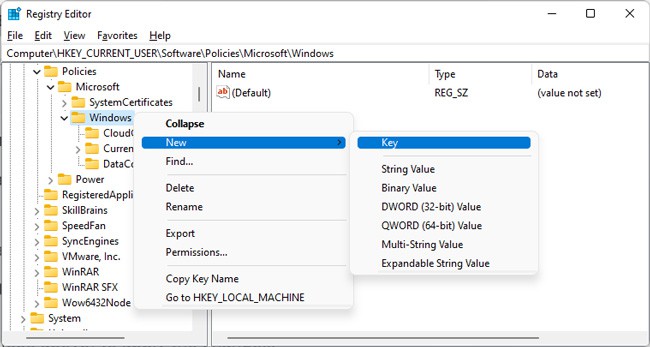
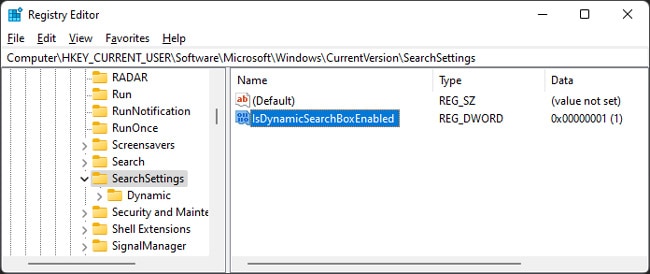
Through Registry Editor
Another way you can change this setting is by modifying the relevant registry entry. Here’s how you can do so:
Related Questions
How to Hide and Unhide Search Icon on Windows
If you have disabled Windows Search, you might as well hide its icon to save space on the Taskbar. Here’s how you can do so: On Windows 11 On Windows 10
How to Enable/Disable Win + S Search Shortcut?
Here’s how you can enable or disable the Win + S shortcut for Search. However, keep in mind that it also disables other hotkeys that include Win + S, such as Win + Shift + S for the snipping tool. To enable or disable this shortcut: You don’t need to create this value if it already exists. You can also add S to any other keys already present in the value by separating them with a comma.


![]()
