However, your computer most probably has a built-in application to do so. You can also choose what file type you’d like to save your images on. Working with the clipboard is pretty easy, and we guarantee that you’ll get the hang of it in no time. Therefore, we have prepared this guide to help you understand exactly what the clipboard is, how it operates, and what steps you can take to save clipboard images. We listed out these steps for some of the most popular OS, namely the macOS, Windows, and Linux.
What is a Clipboard?
A clipboard is a small storage space that’s volatile in nature. All the contents within it are stored in the system RAM and will disappear once you restart your computer. Moreover, if you screenshot multiple images, the first image will be overwritten by the second on the clipboard. So, if you plan on working with multiple image files, you manually have to copy each image from the clipboard and save it to your computer before you take another screenshot.
How to Save Clipboard Images on Mac?
You can export the screenshot images from the clipboard to your computer automatically by using the built-in Preview tool. However, for images copied from the internet, you have to resort to a third-party application. So,
Using Preview
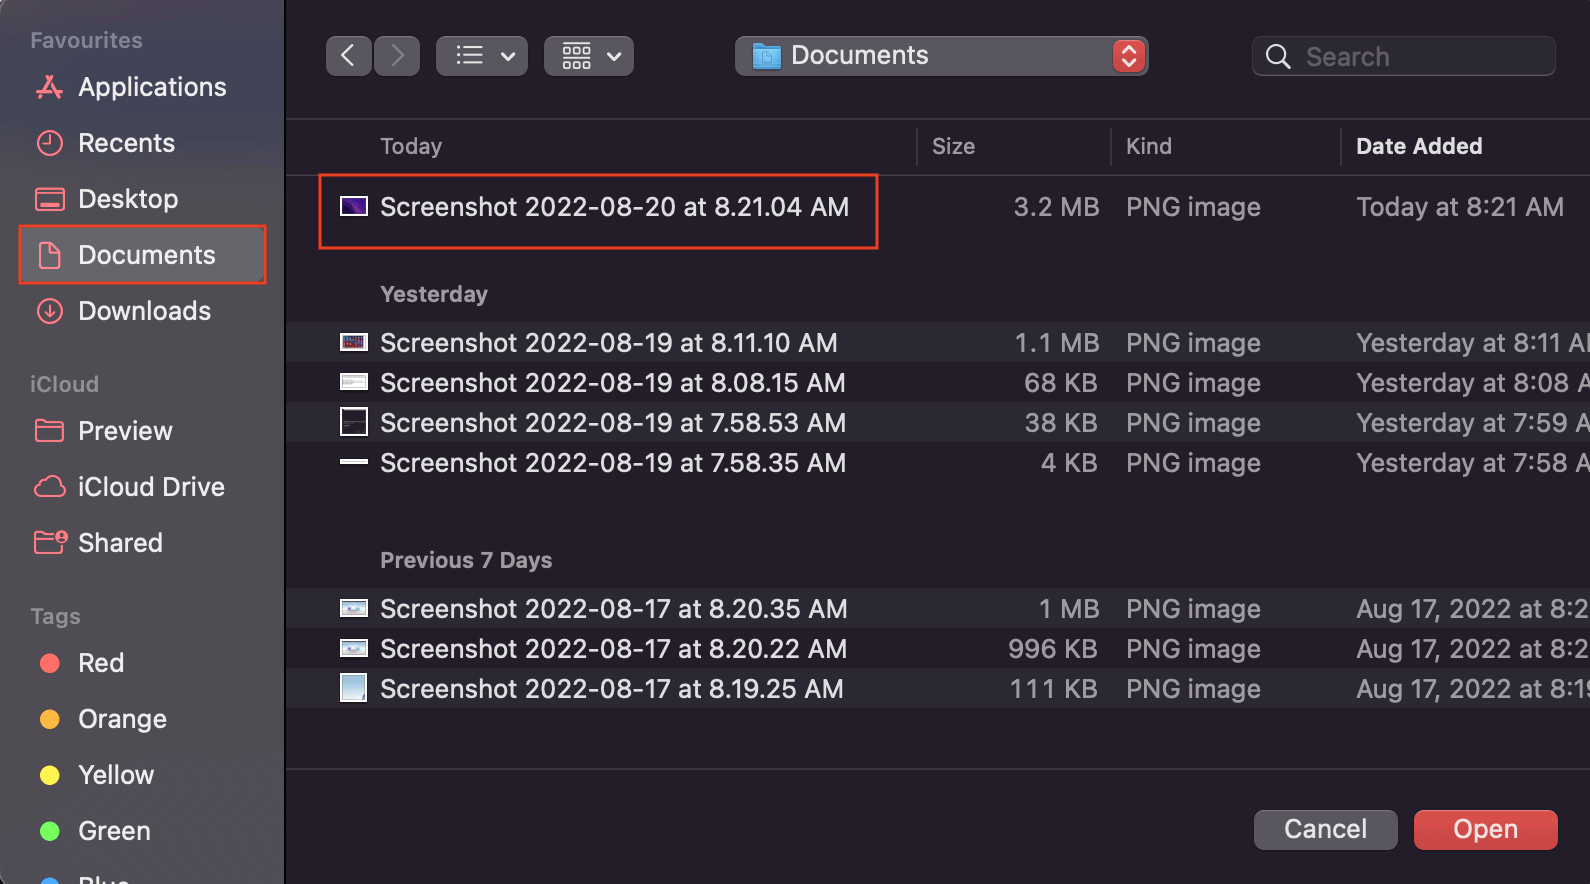
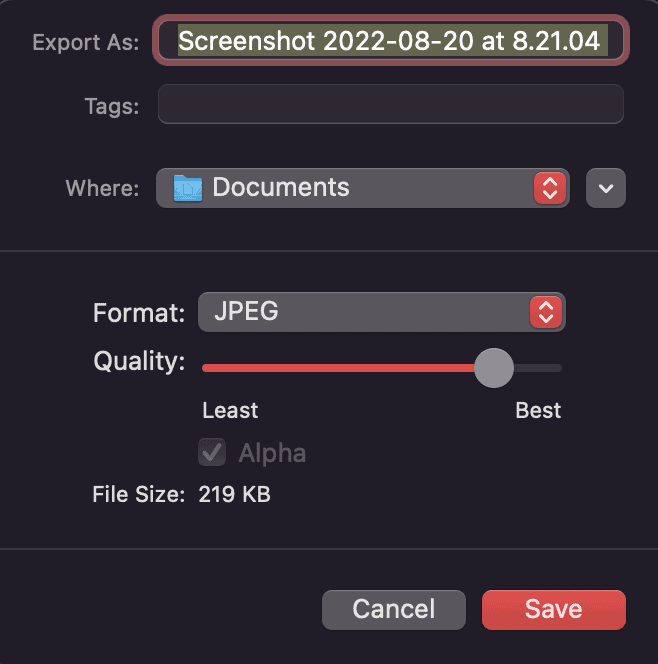
Any screenshots you take and store on the clipboard are automatically saved to your Documents folder. However, you can manually select the location and file format using the Preview tool. For this,
Using Third-Party Applications
For images copied from the internet, you have to use third-party applications to export them to your computer. That is, if you Right-click > Copy Image from the web, you won’t be able to save it directly on the Preview window. For this, you must resort to third-party applications such as Adobe Photoshop and other image editors that effectively do the job. No matter which application you use, simply open a blank canvas and press Command + S to save the image on the canvas. Then, simply export it to your computer.
How to Save Clipboard Images on Windows?
You can save clipboard images on a Windows OS by only using the built-in tools. Here, we will be working with MS Paint and the ScreenSnip tool. So,
Using MS Paint
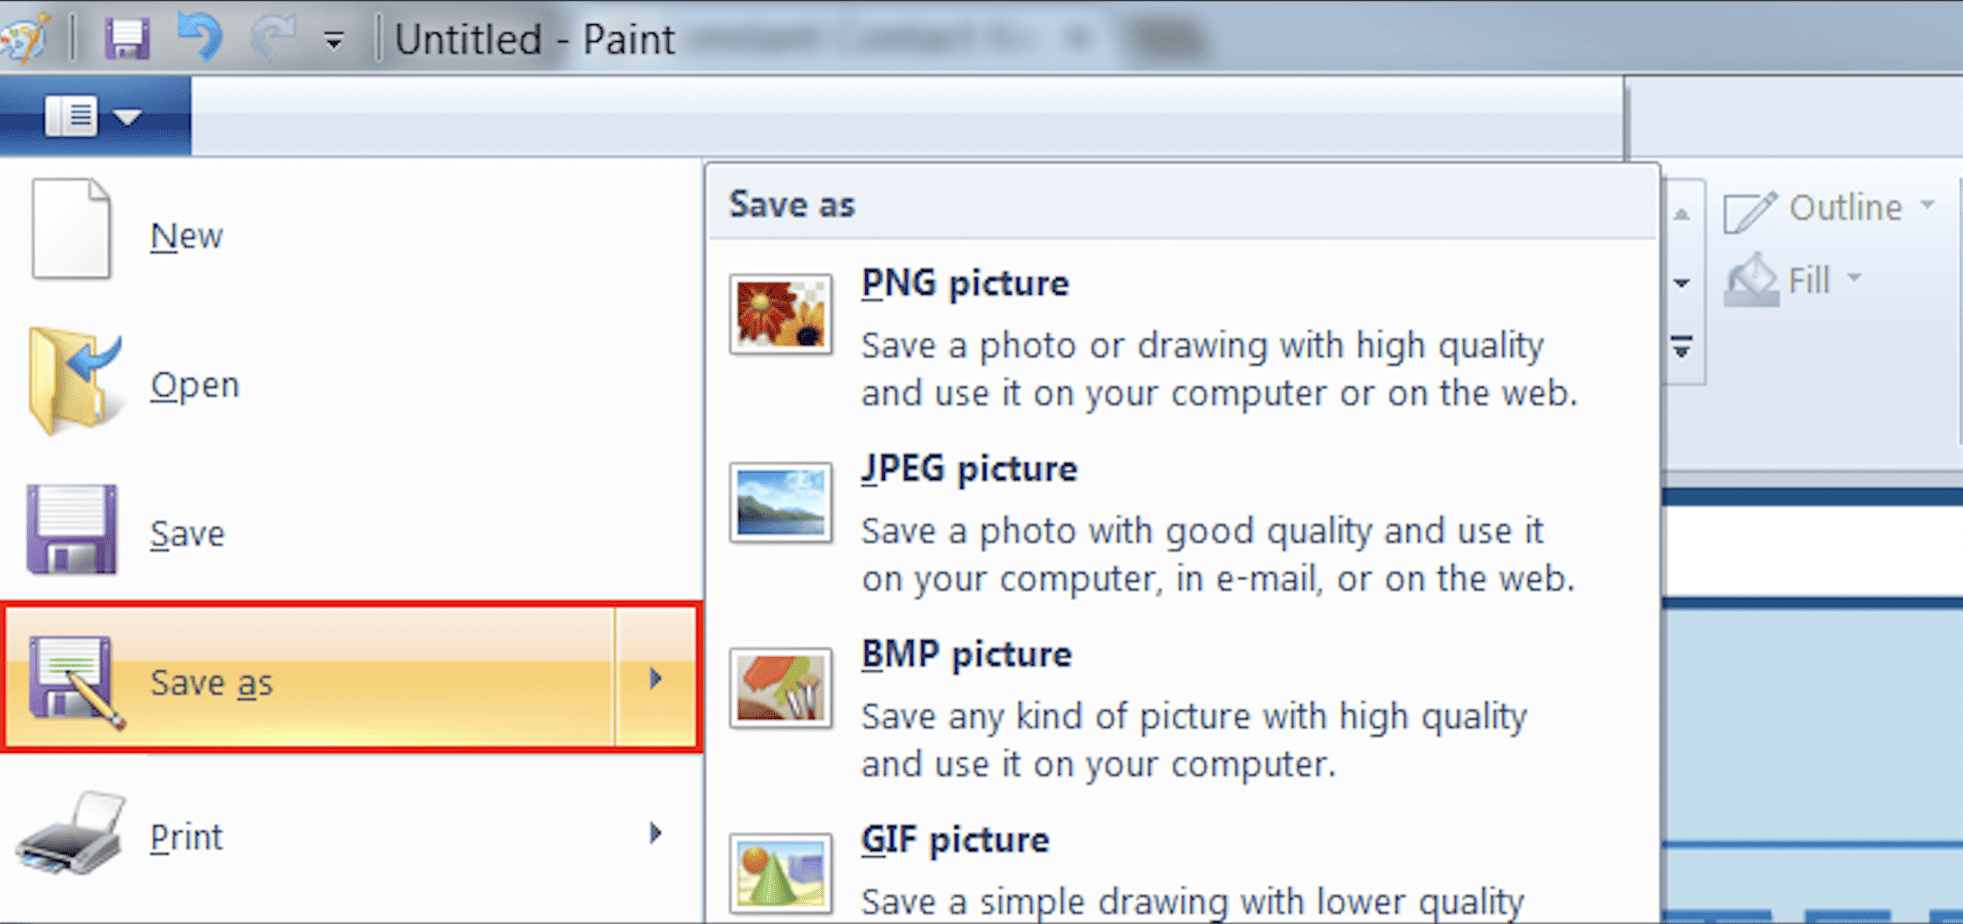
Through MS Paint, you can easily save your clipboard images in various file formats (png, jpg, etc.). The main idea is to first save an image on the clipboard, copy the image on a blank MSpaint canvas and then, export the image to your local storage. For this,
Using the Snipping Tool
The Snipping tool is a screen snip tool available for your Windows computer. Usually, it’s pre-installed on the Windows OS; however, even if it’s not, you can download it through the Microsoft Store. So, for this,
How to Save Clipboard Images on Linux?
When you take a screenshot on your Linux PC, you’ll get an automatic prompt to save the clipboard image on your computer. However, this only works for screenshots, and for images copied from the internet, you have to resort to other methods. The methods are listed below, one using the Terminal and the other via an open source Linux Image Editor. Here, we’ve chosen to use Gimp.
Using Terminal
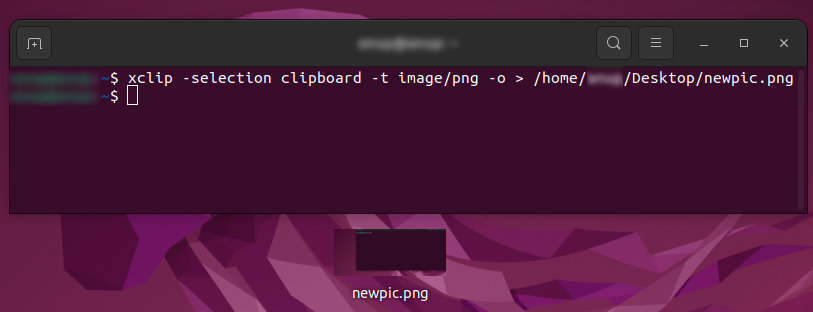
Using the terminal, you can first command your computer to select the clipboard image and then, save the image on your computer. So, for this,
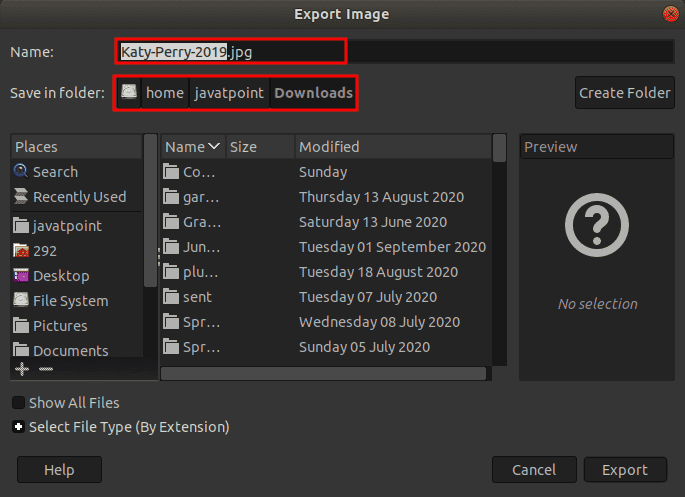
Using Gimp
Gimp is a free open source image editor, popular with Linux users all around. It can be used as a replacement for MS Paint or the Widnows photoshop tools. Here is how to open clipboard images using Gimp.